Custom word lists let you assign groups you created yourself — by theme, unit, or class — so students practice the exact words you want. After you create a group and add at least one list, you can assign it in a few minutes.
Step 1: Go to Custom Word Lists
- From your Teacher Dashboard, click Word Lists in the left sidebar.
- At the top of the page, select the Custom Word Lists tab.
Step 2: Find the group you want to assign
- Each card is a list group (a folder that holds your word lists).
- Cards marked Assigned are already visible to your students. Cards marked Not Assigned are not yet active.
- A group must contain at least 1 list before you can assign it. If the group is empty, click Manage Lists and add a list first.
- Click Quick View on any card to preview the lists and words inside the group before assigning it.
Note: If you don’t have a custom group yet, click New List Group to create one, then add at least one list before assigning.
Step 3: Click Assign to students
- On the group card, click Assign to students. This opens the assignment form with your custom group already selected.
- Confirm the dropdowns show Teacher Custom Lists as the List Group Type, along with the correct Group Category and List Group.
- Click Next Step to continue.
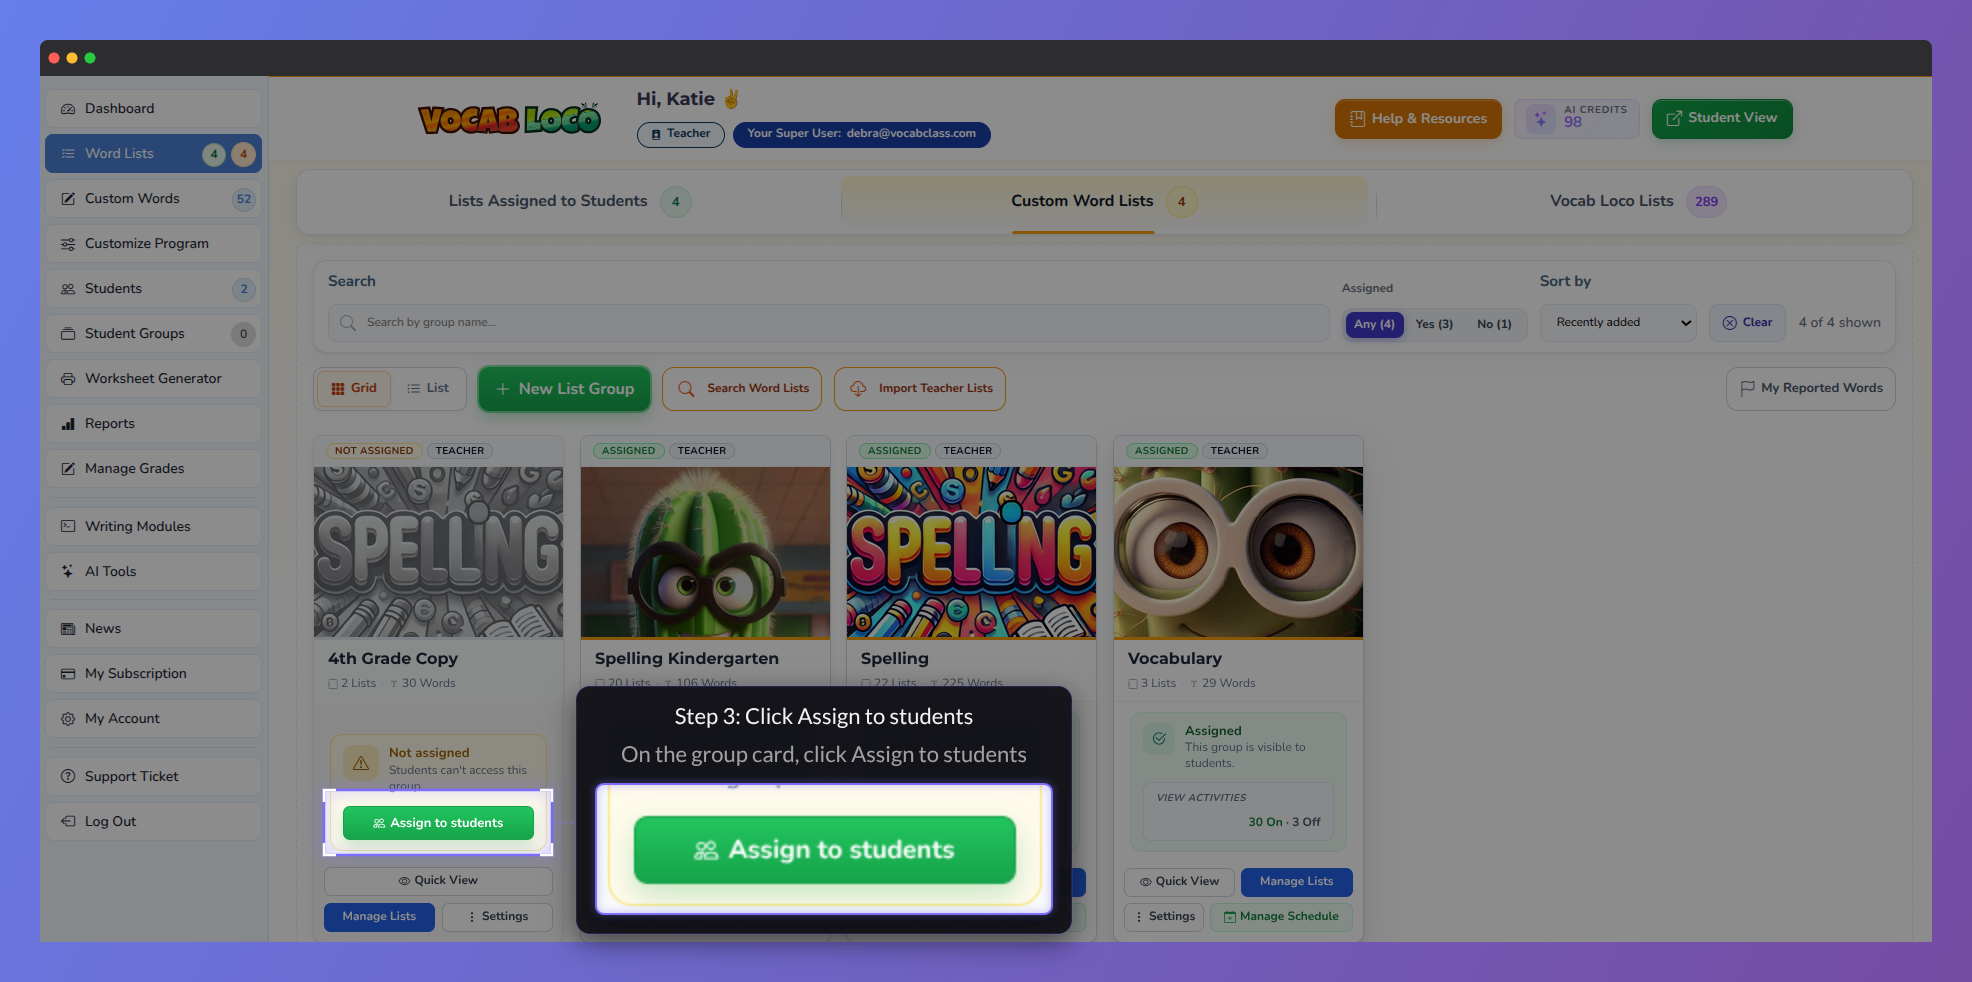
Screenshot showing the “Assign to students” button highlighted in a word list group.
Pro Tip: Starting from the Custom Word Lists tab is the fastest path — the form is pre-filled with your group. You can also start from the Lists Assigned to Students tab by clicking Assign Word Lists, then choosing Teacher Custom Lists in the List Group Type dropdown.
Step 4: Select students
- The student table shows everyone enrolled in your class. Use the search field, grade filter, or group filter to narrow the list.
- Check the box next to each student who should receive this assignment, or use the header checkbox to select everyone at once.
- The counter at the top of the table shows the total, assigned, and unassigned counts as you make your selections.
- Click Next Step to continue.
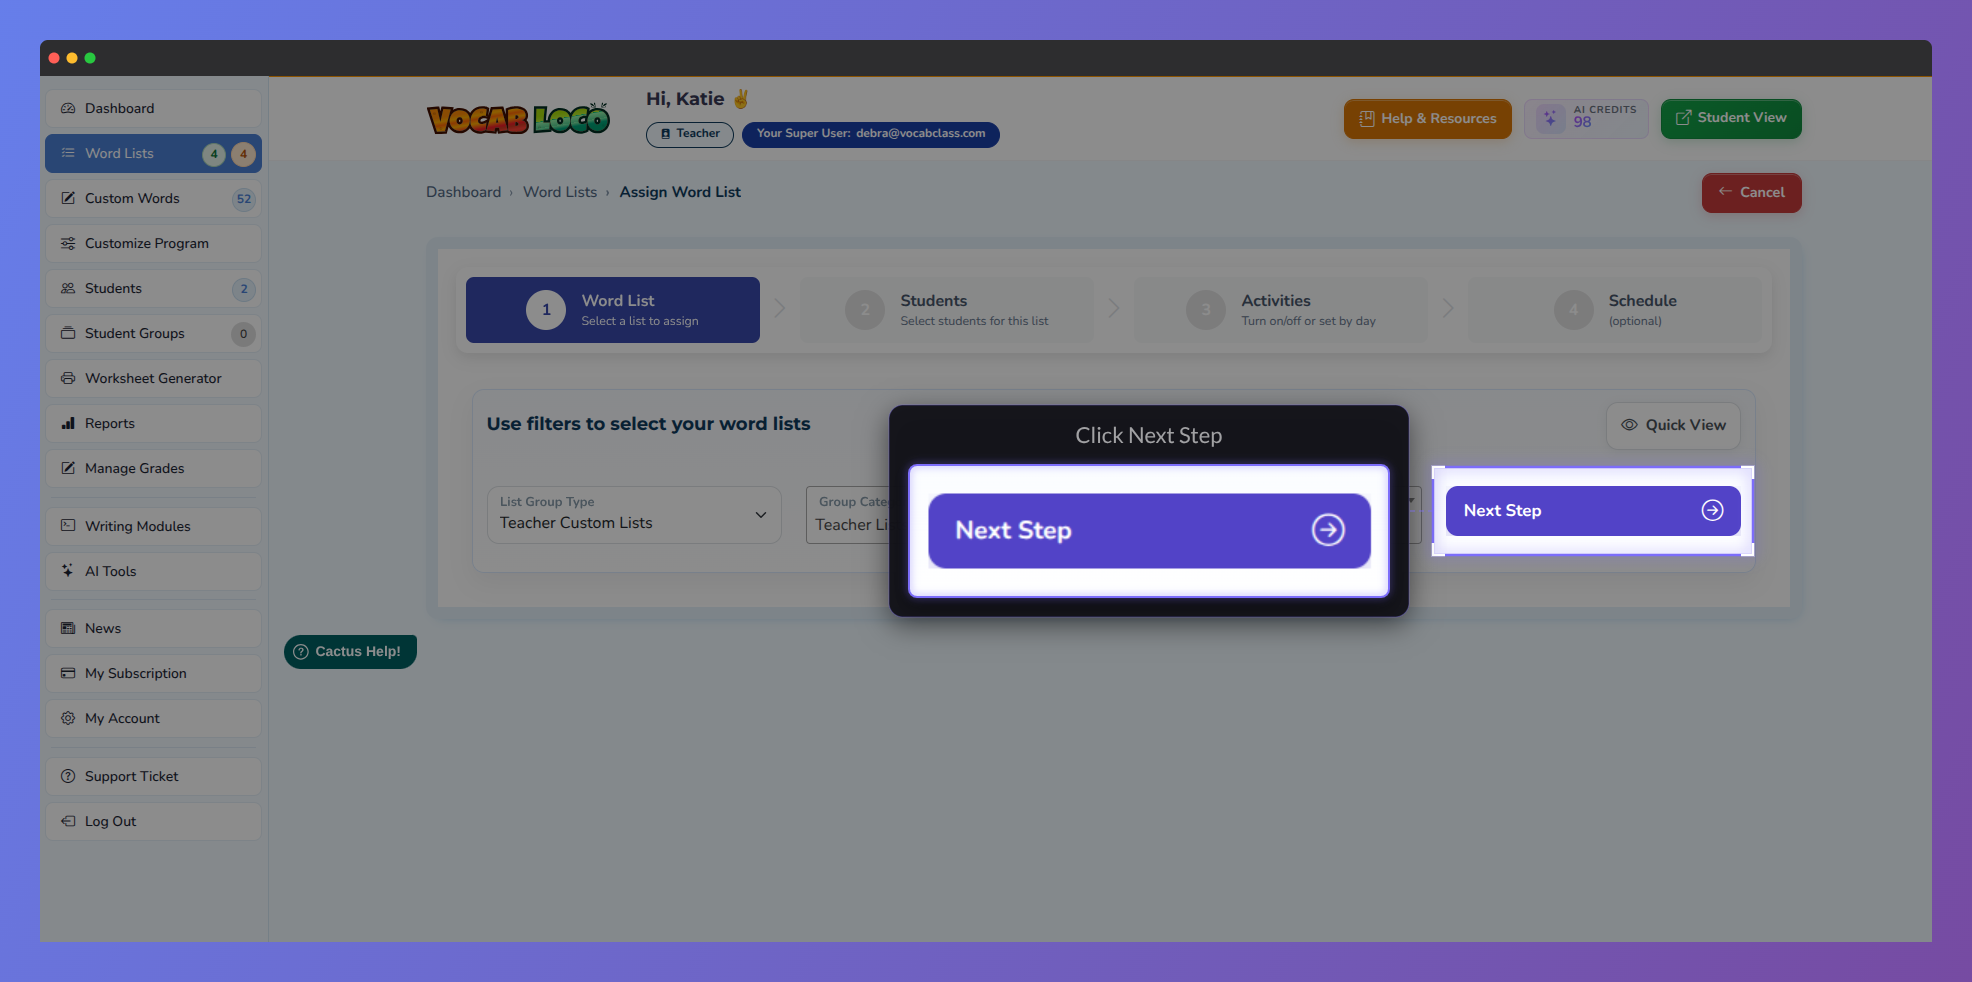
Screenshot showing the “Next Step” button highlighted in the Assign Word List workflow.
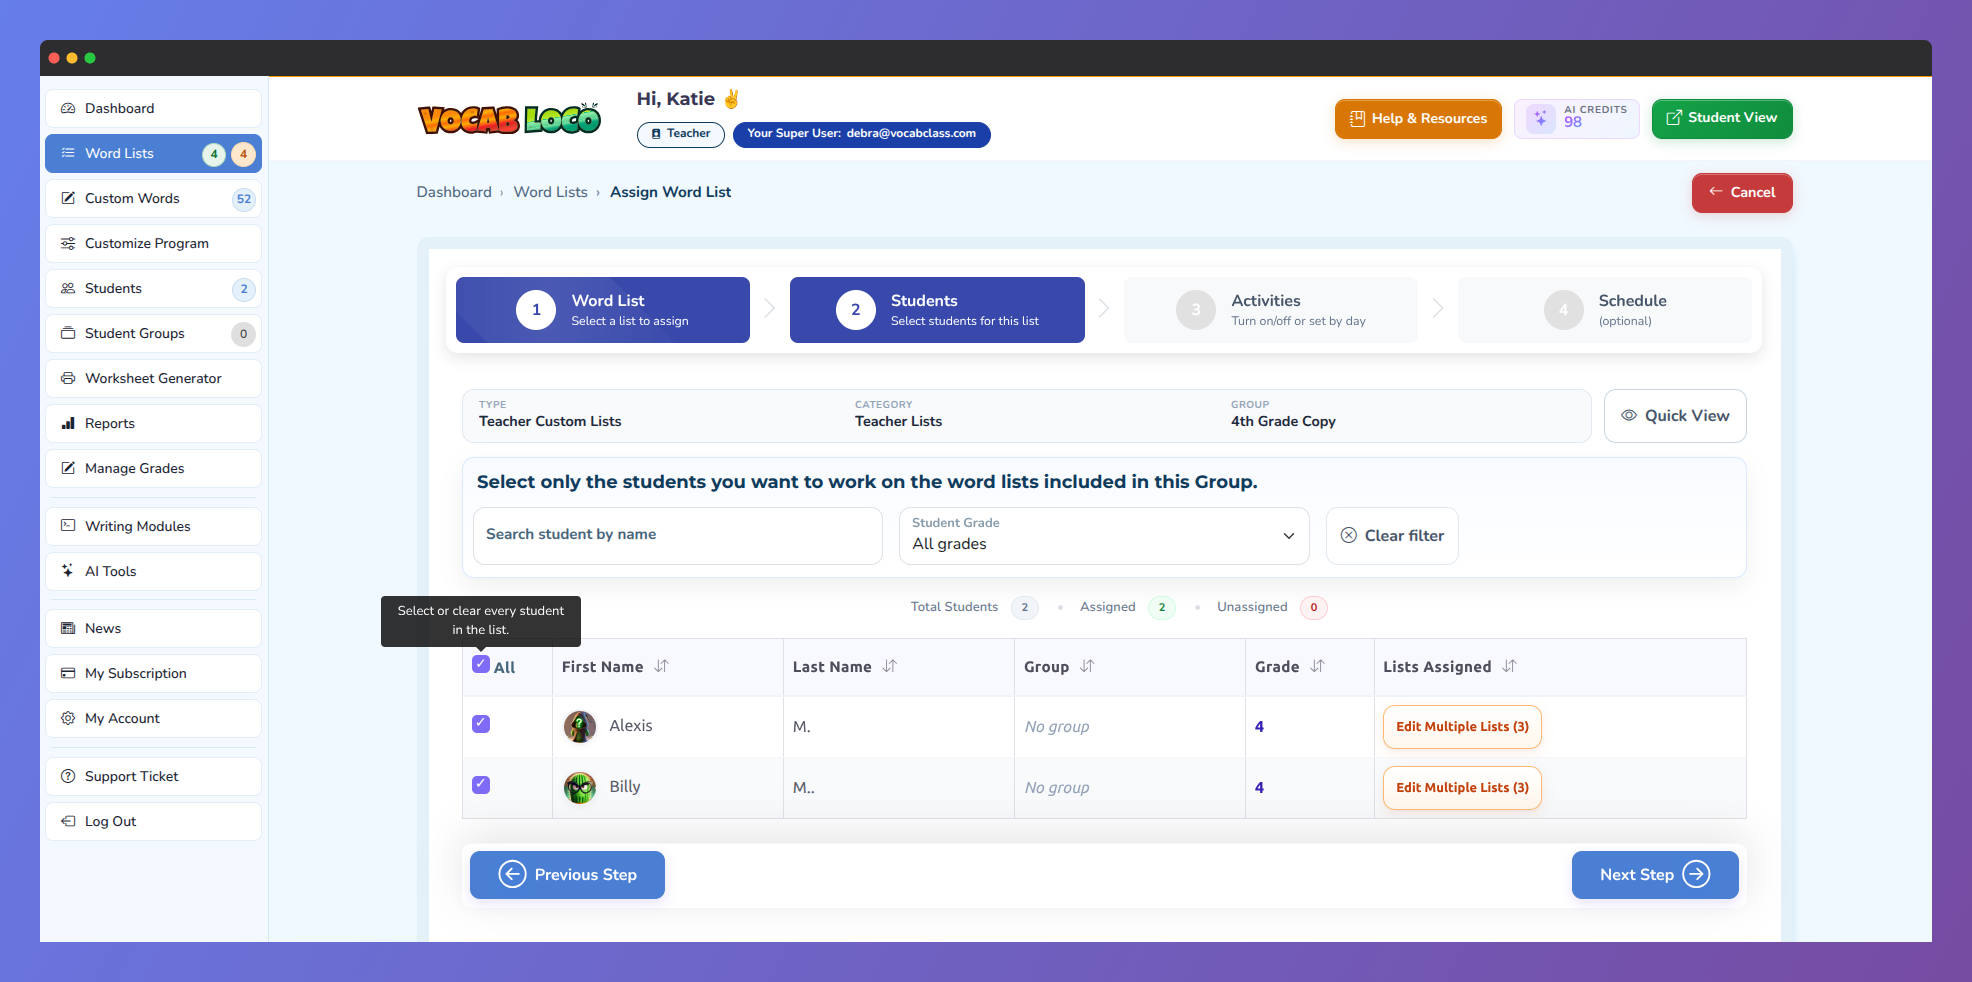
Screenshot of the "Students" step in the Assign Word List workflow, with students selected.
Step 5: Configure activities
- Activities are organized by type — Vocabulary, Spelling, Writing, Typing, and Special. Toggle each activity ON or OFF based on what you want students to access.
- For each active activity, set the available days: Anydays, Weekdays, Weekends, Fri + Weekend, or specific individual days.
- For the Vocabulary Test and Spelling Test, set the minimum passing grade (default: 70%) and the number of allowed tries.
- Use Quick Settings to turn all activities on or off at once, or apply the same day settings to an entire activity type using the Bulk Action button.
- Click Next Step to continue.
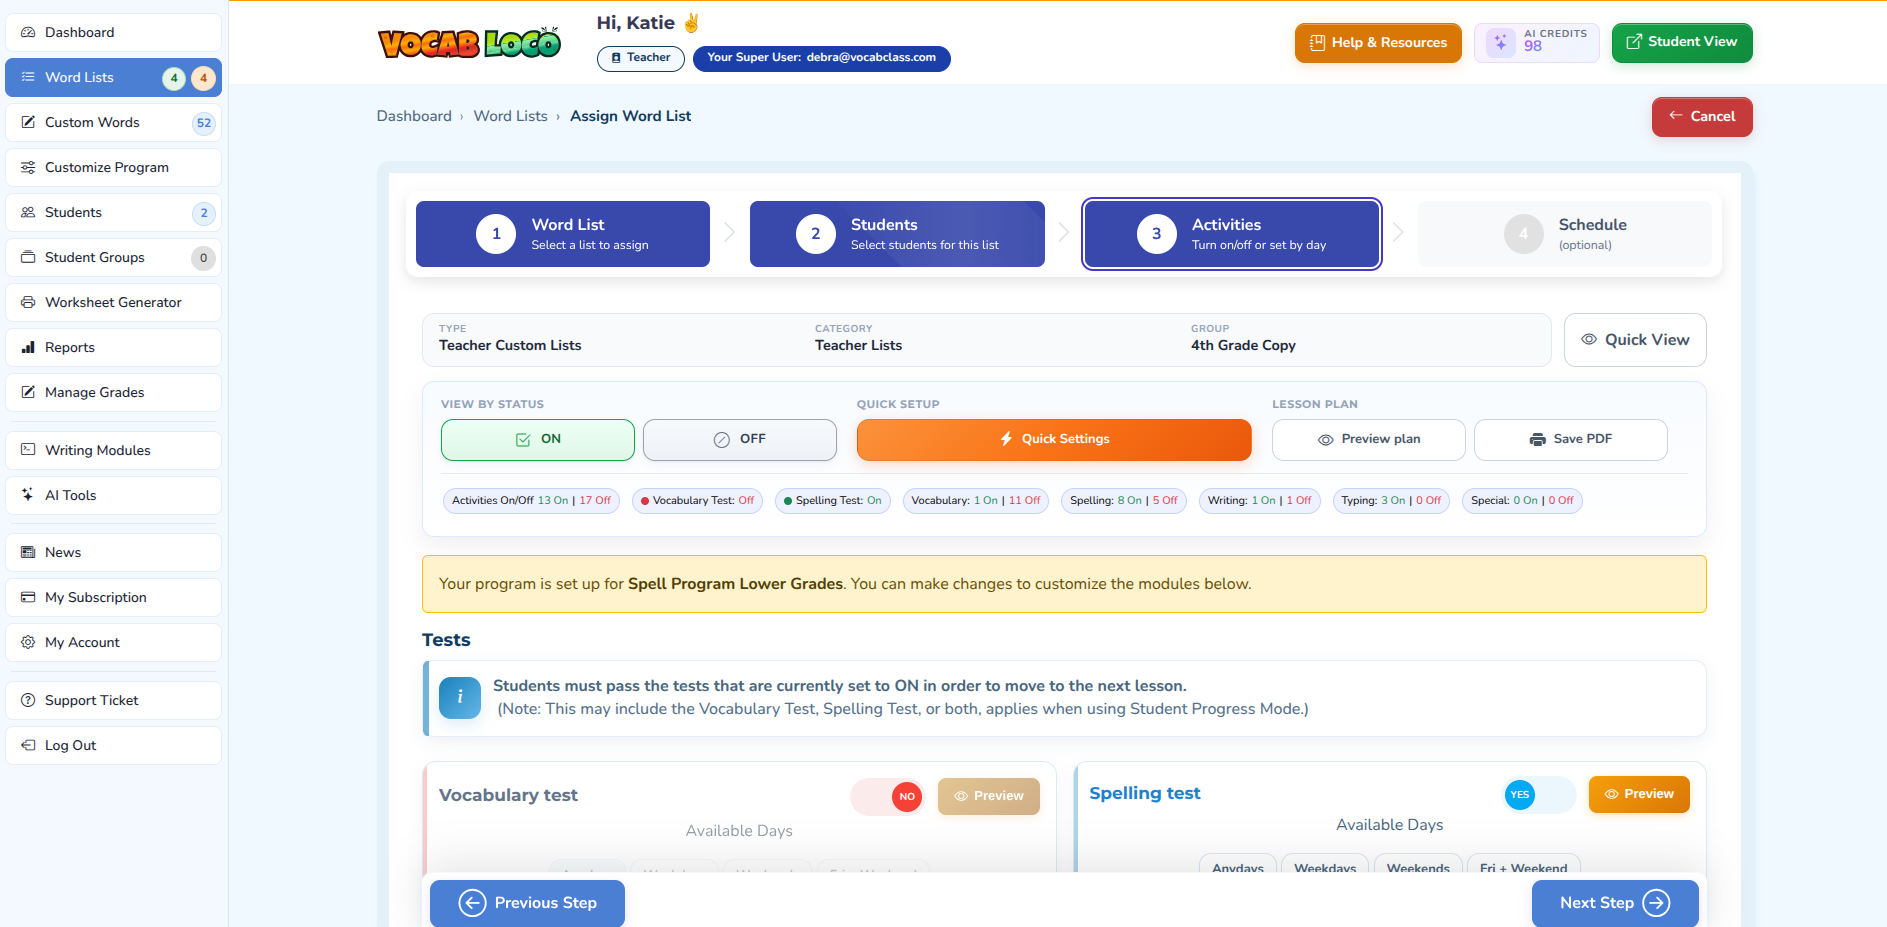
Screenshot of the "Activities" step in the Assign Word List workflow, showing test and module settings with Vocabulary test off and Spelling test on.
Note: Students must pass the tests set to ON in order to move to the next lesson when using Student Progress mode.
Step 6: Set a schedule (optional)
Choose an assignment mode:
- Student Progress — students advance through lessons by completing activities at their own pace.
- Schedule Lists — students access lessons based on start and end dates you set.
- Mixed — some students follow a schedule, others work at their own pace.
- If using Schedule Lists, click the action button next to each student to set lesson dates, or select multiple students and use Bulk Schedule Selected to apply the same dates at once.
- If you prefer not to set a schedule now, you can skip this step and configure it later from the assigned lists page.
Step 7: Save the assignment
- Click Save and exit to confirm the assignment. The list group will appear in your Lists Assigned to Students tab and will be visible to the selected students immediately.
Pro Tip: After saving, you can toggle the assignment ON or OFF at any time from the assigned lists page — useful if you want to prepare an assignment in advance without making it visible to students right away.
Q: Why is Assign to students disabled on my group card?
A: The group has no lists yet. Click Manage Lists, add at least one list, then try again.
Q: Do I need to reassign the group after I add or edit words?
A: No. Changes to the lists and words inside the group apply to the existing assignment.
Q: Can I assign a custom group to only some of my students?
A: Yes. In Step 4, check only the students who should receive this assignment.
Was this article helpful?
That’s Great!
Thank you for your feedback
Sorry! We couldn't be helpful
Thank you for your feedback
Feedback sent
We appreciate your effort and will try to fix the article